
A Slice of Sunshine on a Plate
You know that feeling when you take a bite of something so good, you just have to close your eyes for a second? That’s this cheesecake. I first made this Southern Pineapple Orange Swirl Cheesecake for a gloomy Sunday family lunch, and let me tell you, it was like we brought the summer sunshine right into the dining room. The cheerful swirl of tropical flavors not only brightened everyone’s mood but has since become my go-to dessert for bringing a little joy to any table.
The Story Behind This Tropical Treat
While the classic New York cheesecake is a beloved icon, Southern desserts have a magical way of incorporating bright, fruity flavors to lighten things up. This recipe is my own happy twist on that tradition. I wanted to capture the feel of a sunny porch sip of pineapple-orange juice in a rich, creamy dessert. It’s a modern take that feels both special and wonderfully familiar, blending the comfort of cheesecake with the vibrant zest of the tropics.
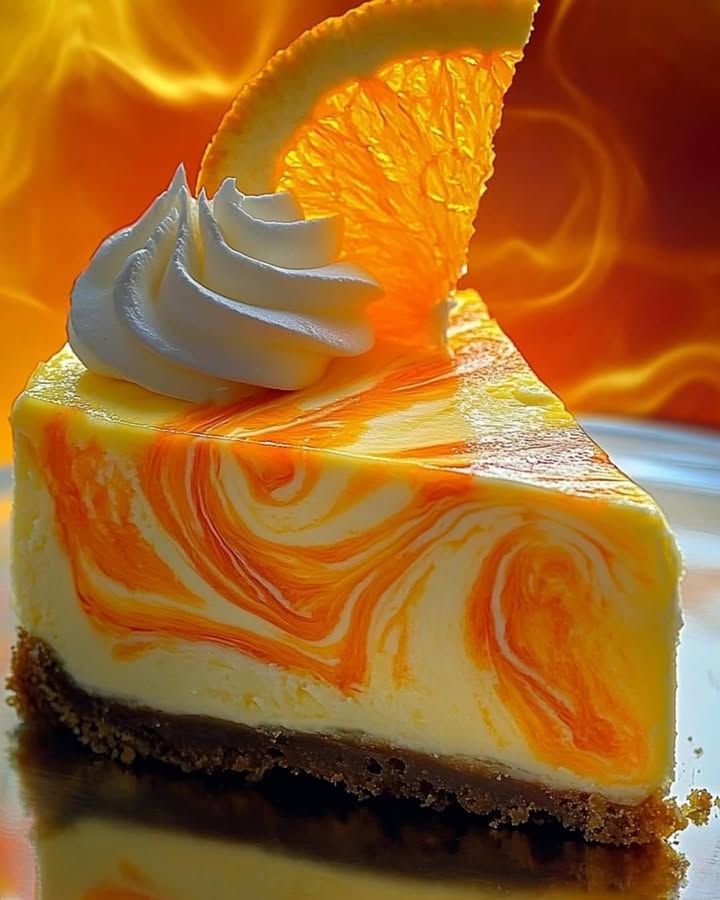
Why You’ll Adore This Pineapple Orange Cheesecake
This isn’t just another cheesecake. First, the marbled look is stunning—it’s almost too pretty to eat! Second, the balance is perfect. The rich, tangy cream cheese filling gets a fantastic lift from the sweet pineapple and zesty orange. It’s surprisingly simple to make, but the result looks and tastes like you spent all day in the kitchen. It’s a guaranteed crowd-pleaser that feels fancy without the fuss.
Perfect Occasions for This Show-Stopper
This cheesecake is incredibly versatile! It’s a star at summer potlucks and barbecues, bringing a refreshing note. I love serving it for Easter, Mother’s Day, or any spring celebration where you want something bright. It’s also a wonderful way to end a casual weekend dinner with friends. Honestly, it’s so cheerful it can turn an ordinary Tuesday into a mini-vacation.
Gathering Your Ingredients
Here’s what you’ll need to create this sunshine-filled dessert:
- 1 1/2 cups graham cracker crumbs
- 1/4 cup melted butter
- 2 tablespoons sugar
- 3 (8 oz) packages cream cheese, softened
- 1 cup sugar
- 1 teaspoon vanilla extract
- 3 large eggs
- 1 cup sour cream
- 1/4 cup all-purpose flour
- 1/2 cup pineapple juice
- 1/2 cup orange juice
- Orange food coloring
- Whipped cream, fresh pineapple slices, orange slices, and mint leaves for garnish
Easy Swaps and Substitutions
No worries if you’re missing an item! Here are some easy fixes:
- Graham Cracker Crumbs: You can use digestive biscuits or vanilla wafer crumbs for a similar crust.
- Sour Cream: Plain, full-fat Greek yogurt is a great substitute and adds a lovely tang.
- Juices: For a more intense flavor, use thawed frozen juice concentrates. Just dilute them slightly.
- Food Coloring: This is optional! The swirl will still taste amazing, though it won’t have that vibrant orange hue.
Crafting Your Southern Pineapple Orange Cheesecake
Let’s get baking! Follow these steps for a perfect, creamy cheesecake with a beautiful swirl.
Step 1: The Buttery Base
Start by preheating your oven to 325°F (163°C). In a medium bowl, mix the graham cracker crumbs with the melted butter and sugar. The mixture should feel like wet sand and hold together when you pinch it. Press it firmly and evenly into the bottom of your springform pan. I like to use the bottom of a measuring cup to really pack it down. Bake this for 10 minutes—you’ll smell that warm, toasty, buttery scent. Let it cool completely on a rack. Pro tip: A cool crust helps prevent a soggy bottom later!
Step 2: The Dreamy Filling
In a large bowl, beat the softened cream cheese and sugar together until completely smooth and lump-free. Scrape down the bowl well. Beat in the vanilla, then add the eggs one at a time, mixing just until each is combined. Over-beating the eggs can incorporate too much air and lead to cracks. Finally, gently stir in the sour cream and flour until the batter is velvety and uniform.
Step 3: Creating the Swirl
This is the fun part! Divide the batter evenly between two bowls. Pour the pineapple juice into one bowl and the orange juice into the other. Stir each until fully blended. Add a few drops of orange food coloring to the orange batter and mix until you get a lovely sunset color. Now, carefully pour the pineapple batter over the cooled crust. Gently spoon the orange batter on top. Take a knife or a skewer and slowly drag it through the batter in wide, loose figure-eight motions to create that gorgeous marbled effect. Don’t over-swirl, or the colors will muddy!
Step 4: The Gentle Bake
Place the pan in the center of your preheated oven. Bake for 50-60 minutes. The cheesecake is done when the edges are set but the center still has a slight, gentle jiggle—like Jell-O. Turn the oven off, crack the door open with a wooden spoon, and let the cheesecake cool slowly inside for an hour. This gradual temperature change is the best trick to prevent major cracks. After that, let it cool fully on the counter before refrigerating for at least 4 hours, preferably overnight. Chef’s tip: Patience is key! The long chill sets the texture perfectly.
Your Cheesecake Timeline
Here’s a quick breakdown of the time investment for this Southern Pineapple Orange Swirl delight:
- Prep Time: 25 minutes
- Bake Time: 55 minutes (average)
- Cooling Time: 1 hour (in oven) + 1 hour (room temp)
- Chill Time: 4 hours minimum (overnight is best)
- Total Time: About 7 hours (mostly hands-off chilling)
The Secret to a Crack-Free Top
My number one secret? Room temperature ingredients. Let your cream cheese, eggs, and sour cream sit out for a good hour before you start. This allows them to blend together smoothly without overmixing. Overmixing incorporates air bubbles that expand and contract in the oven, leading to cracks. A smooth, well-incorporated batter bakes evenly and stays gorgeous.
A Fun Fact About Your Ingredients
Did you know the enzyme bromelain in fresh pineapple can prevent gelatin from setting and can make dairy taste bitter? That’s why we use juice in the filling! Cooking (or using canned/j bottled juice) deactivates the enzyme, giving us all the sweet, tropical flavor without any texture issues. Science in the kitchen is pretty cool!
Your Cheesecake Toolbox
You don’t need fancy gear! Here are the essentials:
- 9-inch springform pan (non-negotiable for easy release!)
- Electric mixer (hand or stand)
- Mixing bowls
- Measuring cups and spoons
- Spatula
- Knife or skewer for swirling
Storing Your Tropical Masterpiece
Once fully chilled and served, any leftover cheesecake should be covered tightly with plastic wrap or stored in an airtight container. It will keep beautifully in the refrigerator for up to 5 days. The flavors actually meld and get even better on day two!
For longer storage, you can freeze this cheesecake. Wrap the whole cheesecake or individual slices tightly in plastic wrap, then a layer of aluminum foil. It can be frozen for up to 2 months. Thaw overnight in the refrigerator before serving.
Always garnish with fresh whipped cream and fruit just before serving. This keeps the garnishes fresh and the presentation perfect. Pre-garnished slices stored in the fridge will get soggy.
Tips for Cheesecake Success
- Use a water bath for ultimate creaminess. Wrap the springform pan bottom in foil, place it in a roasting pan, and pour hot water halfway up the sides before baking.
- Run a thin knife around the edge of the cheesecake right after baking. This helps it pull away from the pan evenly as it cools, reducing cracks.
- If a few small cracks do appear, don’t sweat it! Your lavish garnish of whipped cream and fruit will cover them right up.
Presentation Ideas That Wow
- Create a “sunshine” pattern with thin orange and pineapple slices fanned around the top.
- Serve with a drizzle of homemade caramel or a mango puree for extra flair.
- For individual servings, use a warm, clean knife to slice. Wipe it between each cut for perfectly clean slices.
- Place mint leaves strategically for a pop of green that makes the colors sing.
Love This Flavor? Try These Variations!
If you enjoyed this tropical twist, you might love exploring other flavor combinations. For instance, if you’re a no-bake fan, our Creamy Pineapple Cheesecake is a refreshing, fuss-free option. Another incredible baked option is our ultra-decadent Caramel Fudge Cheesecake for when you need a seriously chocolatey fix. The great thing about cheesecake is its versatility—the base recipe is a perfect canvas.
Looking for other fruity desserts? A classic Black Forest Cake offers a beautiful mix of chocolate and cherry. And for something savory to balance all this sweetness, our easy Reuben Pastry Squares are a fantastic appetizer or lunch.
Common Mistakes to Avoid
Mistake 1: Using Cold Ingredients
This is the biggest culprit for a lumpy batter and a cracked cheesecake. Cold cream cheese doesn’t blend smoothly with sugar, leading to graininess. Cold eggs and sour cream can also cause the batter to curdle or separate. How to avoid it: Plan ahead! Take your cream cheese, eggs, and sour cream out of the fridge at least an hour before you start baking. They should feel cool to the touch, not cold.
Mistake 2: Overmixing the Batter
Once you add the eggs, it’s time to be gentle. Beating the batter on high speed after adding eggs whips in too much air. Those air bubbles expand in the oven and then collapse as the cheesecake cools, creating cracks. How to avoid it: Mix the eggs in on low speed, and only until they are just incorporated. A few small streaks are okay—they will blend in with the final stirs.
Mistake 3: Overbaking the Cheesecake
A dry, overbaked cheesecake loses its creamy, dreamy texture. Many bakers wait for the center to be completely firm, but that’s too late. How to avoid it: Look for a slight, gentle jiggle in the center when you gently shake the pan—about the size of a quarter. The edges will be set. Remember, it will continue to set as it cools in the turned-off oven.
Mistake 4: Skipping the Slow Cool
Pulling a hot cheesecake out of the oven and plopping it on the counter is a shock to its system. The sudden temperature drop almost guarantees a big crack right down the middle. How to avoid it: Always use the “cool in the oven” method. Turn the oven off, crack the door, and walk away for an hour. This gentle cooldown is your best defense.
Frequently Asked Questions
Can I use fresh pineapple and orange juice in this recipe?
You absolutely can use freshly squeezed juices! The flavor will be wonderfully bright and vibrant. Just make sure to strain the pineapple juice well to remove any pulp that might affect the perfectly smooth texture of the filling. Keep in mind that fresh orange juice can vary in sweetness, so you might want to taste the orange batter before swirling and add a tiny bit more sugar if your oranges are particularly tart.
Why did my cheesecake crack in the middle?
Cracks usually happen from a few common issues: overmixing the batter (adding too much air), overbaking, or cooling the cheesecake too quickly. Don’t worry, it still tastes amazing! To prevent cracks next time, ensure your ingredients are at room temperature, mix gently after adding eggs, bake until just jiggly in the center, and always let it cool slowly in the turned-off oven. A water bath is another great technique for many bakers to ensure even, gentle heating.
Do I really need to refrigerate it overnight?
While the minimum chill time is 4 hours, overnight is highly recommended. Cheesecake is a custard that needs ample time to fully set its structure. Chilling overnight allows the flavors to meld beautifully and gives you that firm, sliceable texture that holds its shape perfectly when you cut into it. It’s worth the wait for the best possible result.
Can I make this cheesecake gluten-free?
Yes, it’s very easy to adapt! Simply use a certified gluten-free graham cracker or cookie for the crust crumbs. For the filling, swap the 1/4 cup of all-purpose flour with a gluten-free 1-to-1 baking blend. This small amount of flour helps stabilize the filling, and a good blend will work perfectly without altering the taste or texture of your Southern Pineapple Orange Swirl Cheesecake.
What can I use instead of a springform pan?
A springform pan is ideal because the removable sides make serving so easy. If you don’t have one, you can use a deep 9-inch pie dish. Be very careful when pressing in the crust up the sides. Note that removing neat slices will be more challenging. You would likely need to serve it directly from the dish with a pie server.
How do I know when the cheesecake is done baking?
The visual and jiggle test is your best friend. The edges should look puffed and set, while the center (about a 3-inch circle) should still look slightly soft and jiggle uniformly when you gently shake the pan. It will firm up as it cools. Avoid using a toothpick test, as a clean toothpick means it’s overbaked for a cheesecake.
Can I freeze the leftover cheesecake?
Definitely! Cheesecake freezes exceptionally well. Wrap individual slices or the whole cheesecake (once fully chilled) tightly in plastic wrap, then in foil or a freezer bag. It will keep for up to 2 months. Thaw it overnight in the refrigerator. This is a fantastic way to always have a delicious dessert on hand for unexpected guests.
Is the food coloring necessary?
Not at all! The food coloring is purely for visual appeal to make the orange swirl pop against the pale pineapple batter. Without it, your swirl will be more subtle in color but will taste exactly the same. You could also use a tiny bit of turmeric for a natural yellow-orange hue, but use it very sparingly.
Why use flour in a cheesecake filling?
The small amount of flour acts as a stabilizer. It helps absorb some of the moisture from the juices and eggs, resulting in a firmer, creamier set that slices neatly. It’s a common tip in many Southern-style cheesecake recipes to ensure the added liquid from fruit purees or juices doesn’t make the filling too loose.
Can I use low-fat cream cheese and sour cream?
You can, but the texture and flavor will be different. Full-fat dairy products give cheesecake its signature rich, creamy, and luxurious mouthfeel. Low-fat versions have more water and stabilizers, which can lead to a softer, less firm set and a slightly tangier taste. For the best results, I always recommend using full-fat ingredients. Making desserts like this at home allows you to control the quality of what goes into your food, which aligns with the benefits of cooking at home for your well-being.
Ready to Bring the Sunshine?
This Southern Pineapple Orange Swirl Cheesecake is more than just a dessert. It’s a slice of happiness, a conversation starter, and a beautiful way to share something made with love. Whether for a special occasion or just because, its bright flavors and stunning look are sure to impress. So preheat that oven, grab your springform pan, and get ready to bake a little sunshine. Happy baking!
Equipment
- Mélangeur électrique
- Grand bol
- Spatule
- Plaque à pâtisserie
- Papier sulfurisé
Ingredients
- 1 1/2 tasse miettes de biscuits Graham
- 1/4 tasse beurre fondu
- 2 cuil. à soupe sucre
- 3 paquets fromage à la crème, ramolli
- 1 tasse sucre
- 1 cuil. à café extrait de vanille
- 3 grands œufs
- 1 tasse crème aigre
- 1/4 tasse farine tout usage
- 1/2 tasse jus d'ananas
- 1/2 tasse jus d'orange
- q.s. colorant alimentaire orange
- q.s. crème fouettée, tranches d'ananas frais, tranches d'orange et feuilles de menthe pour la garniture
Instructions
- Préchauffez votre four à 163°C (325°F).
- Mélangez les miettes de biscuits Graham, le beurre fondu et le sucre jusqu'à obtenir une texture ressemblant à du sable humide.
- Pressez le mélange uniformément au fond d'un moule à charnière et faites cuire pendant 10 minutes. Laissez refroidir complètement sur une grille.
- Dans un grand bol, battez le fromage à la crème ramolli et le sucre jusqu'à obtenir un mélange lisse. Grattez les parois du bol et incorporez l'extrait de vanille.
- Ajoutez les œufs un par un en mélangeant juste jusqu'à incorporation.
- Incorporez délicatement la crème aigre et la farine jusqu'à obtenir une texture lisse.
- Divisez la pâte en deux bols ; ajoutez le jus d'ananas dans l'un et le jus d'orange (plus le colorant alimentaire) dans l'autre.
- Versez la pâte à l'ananas sur la croûte et déposez la pâte à l'orange sur le dessus, en créant un effet marbré avec un couteau.
- Faites cuire pendant 50-60 minutes jusqu'à ce que les bords soient pris mais que le centre tremble légèrement.
- Éteignez le four, entrouvrez la porte et laissez refroidir à l'intérieur pendant une heure. Puis laissez refroidir sur le comptoir et réfrigérez pendant au moins 4 heures ou toute la nuit.
Notes
Nutrition

Hi, I’m Olivia Parker, the founder of BakingSecret.com and a lifelong lover of all things sweet and homemade. I grew up in a small town in Oregon, where the smell of fresh cookies in my family’s kitchen sparked my passion for baking. Over the years, I turned that passion into a mission: to help home bakers feel confident, inspired, and creative.
After studying food science and working in several artisan bakeries across the U.S., I decided to create a space where everyone from beginners to seasoned bakers can find reliable recipes, expert tips, and a warm, welcoming community. BakingSecret.com is my way of sharing the magic of baking with the world. When I’m not testing new recipes, you’ll find me exploring farmers’ markets, collecting vintage cookbooks, or perfecting my sourdough technique.