
Oh, the sound of a whisk hitting the side of a bowl. The smell of vanilla wafting through a warm kitchen. That’s the magic of baking, my friend! And if you’re looking for a cake that’s as light, joyful, and pure as its name, you’ve found it. The Snowflake Cake is my go-to for birthdays, quiet Sundays, and any day that needs a sprinkle of sweet joy. It’s a simple, stunning cake that rises tall and tender, like a perfect winter morning. Let’s bake it together!
The Story Behind the Snowflake Cake
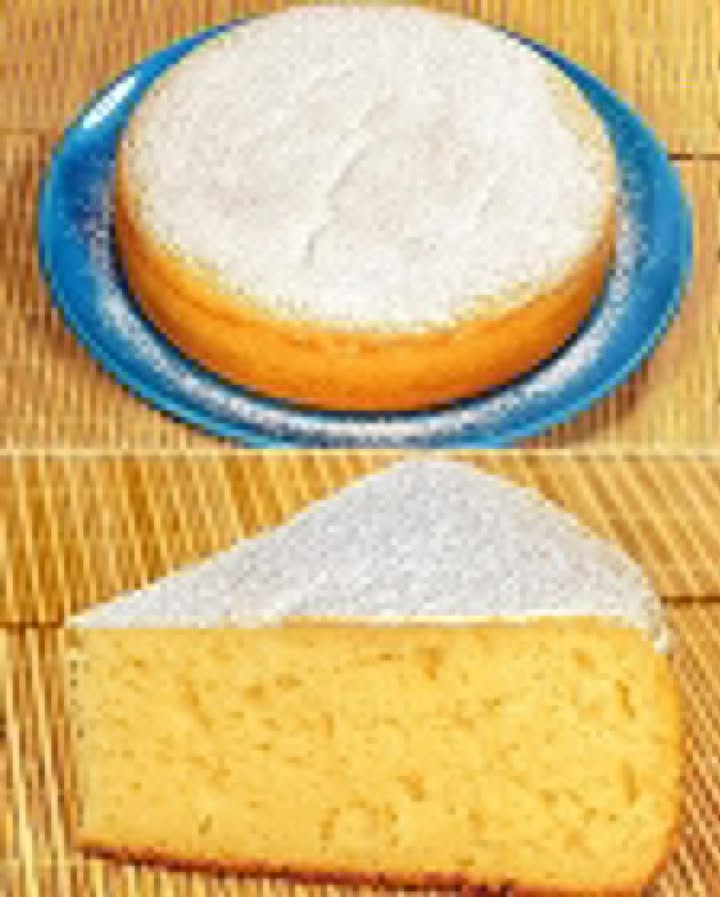
This isn’t a cake with a grand, centuries-old history. It’s a modern classic born from a kitchen experiment! I was aiming for a cake that felt special but didn’t need fancy ingredients. I wanted something airy and soft, with a pure, delicate flavor. After several tries (some less successful, let’s be honest!), this version clicked. The name came from my daughter. She saw the tall, pale cake dusted with powdered sugar and declared, “It looks like a snowflake!” And so, our family’s Snowflake Cake recipe was born.
Why You’ll Love This Simple Snowflake Cake
First, it’s incredibly forgiving. The steps are clear, and the result is reliable. Second, the texture is dreamy. It’s moist but light, with a gentle crumb that melts in your mouth. Third, it’s a blank canvas. You can serve it plain, dusted with sugar, or adorned with berries and cream. It’s the perfect easy cake recipe for when you want something homemade that tastes like a hug.
The Perfect Occasions for Your Snowflake Cake
This cake fits so many moments! It’s ideal for a cozy afternoon tea. It shines as a festive but unfussy birthday cake for someone who loves simplicity. It’s a wonderful treat for a winter holiday gathering, embodying that snowy, peaceful feeling. I’ve also brought it to countless potlucks where it’s always a quiet star, nestled among more elaborate desserts.
What You Need: Snowflake Cake Ingredients
- 3 large eggs
- 150g (about ¾ cup) white sugar
- 1 teaspoon vanilla extract
- 1 tiny pinch of salt
- 60ml (¼ cup) vegetable oil
- 80ml (⅓ cup) milk
- 200g (about 1⅔ cups) all-purpose flour
- 7g (about 1½ teaspoons) baking powder
Simple Substitutions for Your Pantry
Don’t fret if you’re missing something! For the oil, you can use melted butter or even a light olive oil. If you need a non-dairy milk, almond or oat milk works beautifully. For a different flavor, try almond extract instead of vanilla. And if you want to make it a bit richer, use buttermilk instead of regular milk for a lovely tang.
How to Make Your Snowflake Cake: Step-by-Step
Step 1: Prepare Your Oven and Pan
Start by bringing your oven to life. Preheat it to 170°C (340°F). This moderate heat is key for a steady, even rise. Take a 16cm (6-inch) round cake pan and line it with parchment paper. I like to cut a circle for the bottom and strips for the sides. This little step guarantees your beautiful Snowflake Cake will release perfectly without a tear.
Step 2: Beat Eggs, Sugar, and Vanilla
Crack your three eggs into a large mixing bowl. Add the white sugar and that lovely vanilla extract. Now, beat! Use a hand mixer or stand mixer on medium-high speed. Watch the magic happen. The mixture will transform from yellow to a pale, creamy, almost white color. It will become thick and airy, full of tiny bubbles. This is the foundation of your cake’s lightness. Beat for about 4-5 minutes until it’s truly voluminous.
Step 3: Incorporate Oil, Milk, and Flour
Lower your mixer speed to medium. Pour in the vegetable oil and milk. The mixture will become a bit looser and shiny. Now, for the flour. Add it one tablespoon at a time while the mixer is running. This slow addition prevents clumps and keeps the batter smooth. Finally, add the baking powder and that pinch of salt. Give it one last, short mix just to combine everything evenly. Pro tip: Stop mixing as soon as it’s uniform. Overmixing is the enemy of a tender cake!
Step 4: Bake to Perfect Perfection
Your batter is now a smooth, pale, flowing mixture. Pour it gently into your prepared pan. Place it in the center of your preheated oven. Bake for 50 to 55 minutes. The true test? A skewer inserted into the center should come out clean, and the top will be a golden blonde, springy to the touch. The smell filling your kitchen will be irresistible. Let it cool in the pan for 10 minutes, then transfer it to a wire rack.
Your Snowflake Cake Timeline
Prep Time: 15 minutes
Baking Time: 50-55 minutes
Cooling Time: 1 hour (for best slicing)
Total Time: About 2 hours 10 minutes
My Chef’s Secret for the Best Snowflake Cake
The secret is in the eggs and sugar. Don’t rush the beating in Step 2! Those minutes of whipping incorporate air, which acts as a natural leavening agent alongside the baking powder. This double rise creates that spectacular, tall, and airy texture that makes this cake so special.
A Fun Fact About Cake Science
That pinch of salt isn’t just for flavor. In baking, salt actually strengthens the protein network in the flour. This helps the cake structure hold all those lovely air bubbles you created, resulting in a finer, more stable crumb. It’s a tiny ingredient with a big job!
Gather Your Simple Equipment
- 16cm (6-inch) round cake pan
- Parchment paper
- Large mixing bowl
- Hand mixer or stand mixer
- Measuring cups and spoons
- Wire cooling rack
- Skewer or toothpick for testing
How to Keep Your Snowflake Cake Fresh
Once your cake is completely cool, you can store it. If you plan to eat it within two days, simply keep it at room temperature. Place it under a cake dome or in an airtight container. This preserves its perfect moisture and texture.
For longer storage, refrigeration is your friend. Wrap the cake well in plastic wrap or place it in a sealed container. It will stay fresh for up to five days. The cool environment prevents any stale flavors from developing.
You can also freeze this cake! Wrap the whole cake or individual slices tightly in plastic wrap, then in foil. Freeze for up to three months. Thaw it overnight in the refrigerator or for a few hours at room temperature. It tastes just-baked!
My Top Tips for a Foolproof Snowflake Cake
- Always use room temperature eggs and milk. They blend more smoothly into the batter.
- Don’t guess the baking time. Use the skewer test. If it comes out with wet batter, bake 5 more minutes and test again.
- Let the cake cool almost completely before slicing. A warm cake is fragile and can crumble.
- If your oven tends to run hot, check the cake at 45 minutes to prevent over-baking.
Pretty Ways to Present Your Cake
- Dust the top liberally with powdered sugar for the classic “snowy” look.
- Serve with a mound of fresh whipped cream and seasonal berries on the side.
- Drizzle a simple glaze made from powdered sugar and a little milk over the top.
- Place it on a beautiful cake stand with a vintage doily for a rustic charm.
6 Delicious Snowflake Cake Variations
This basic recipe is a wonderful starting point for creativity! Here are six spins to try.
1. Citrus Snowflake Cake: Add the zest of one lemon or orange to the egg-sugar mix. The bright flavor is refreshing.
2. Almond Snowflake Cake: Replace the vanilla extract with almond extract. You can also replace 50g of flour with ground almonds for a nutty twist.
3. Chocolate Chip Snowflake Cake: Fold in 100g of mini chocolate chips after mixing the flour. They create delightful pockets of sweetness.
4. Spiced Snowflake Cake: Add 1 teaspoon of cinnamon and ½ teaspoon of cardamom with the flour. Perfect for fall and winter.
5. Berry-Filled Snowflake Cake: Before baking, scatter a handful of frozen raspberries or blueberries over the batter in the pan. They sink in and create juicy bursts.
6. Yogurt Snowflake Cake: Replace the milk with plain, full-fat yogurt. This makes the cake even more moist and adds a slight tang.
If you love cozy, simple cakes, you might also enjoy my Apple Cinnamon Tea Cake, which is another family favorite. For a truly decadent treat, my Double Chocolate Fudge Cake is a crowd-pleaser. When I want something fruity and light, I turn to this Lemon Blueberry Pound Cake. And for a classic that never fails, my Perfect Vanilla Cupcakes recipe is a staple in my kitchen.
Common Mistakes to Avoid With Your Snowflake Cake
Mistake 1: Not Whipping the Eggs and Sugar Enough
This is the most common pitfall. If you don’t beat the eggs and sugar to a truly pale, thick, and airy state, your cake will lack height and lightness. It might be dense. The whipping creates the necessary air structure. Beat on medium-high for at least 4-5 minutes until the mixture looks like a thick, pale cream.
Mistake 2: Overmixing After Adding the Flour
Once you add the flour, gluten development begins. If you mix too long or too vigorously, you develop too much gluten. This results in a tough, chewy cake, not a soft, tender one. Mix only until the batter is just combined and no flour streaks remain. A few extra seconds of mixing can make a big difference!
Mistake 3: Using the Wrong Pan Size or Not Properly Prepping It
If you use a pan larger than 16cm (6-inch), your cake will be thin and may over-bake quickly. If you use a smaller pan, it might overflow or not cook through. Also, skipping the parchment paper lining can lead to a cake that sticks and breaks when you try to remove it. Always line the pan for a clean release.
Mistake 4: Opening the Oven Door Too Early
It’s tempting to check on your cake, but opening the oven door before the cake has set can cause it to collapse. The sudden drop in temperature interrupts the rising process. Wait until at least 45 minutes have passed before you quickly test it with a skewer.
Mistake 5: Adding Ingredients Too Quickly or All at Once
Pouring the oil and milk in too fast can deflate the airy egg mixture. Adding all the flour in one dump will likely create lumps and require more mixing, which leads to overmixing. Take your time. Pour liquids steadily, and add flour spoon by spoon for the best, smoothest batter.
Remember, baking is a joyful skill that connects us to our food. Exploring resources like the USDA’s advice on healthy cooking skills can enrich your overall kitchen confidence, from choosing ingredients to mastering techniques.
This Snowflake Cake is just one of many wonderful, simple cakes you can master. For more inspiration and recipes like this, explore my collection of easy cake recipes and cupcake ideas.
Your Snowflake Cake Questions Answered
Can I make this Snowflake Cake without a mixer?
Yes, you can, but it will require more effort and time. Use a large whisk and a strong arm! You must whisk the eggs and sugar vigorously for a much longer time, perhaps 8-10 minutes, to achieve that necessary pale, airy volume. Whisk in the oil and milk, then switch to a spatula to fold in the flour carefully. The result might be slightly less lofty but will still be tasty. A mixer just makes the process easier and more reliable.
Why is my Snowflake Cake not rising high?
A few factors could be at play. First, check your baking powder. It might be old and inactive. Baking powder loses its power over time. Second, you might not have whipped the eggs and sugar enough. Third, overmixing the flour can deflate the batter and weaken the structure. Fourth, your oven temperature might be too low, not providing enough initial heat for a good rise. Ensure your ingredients are fresh and follow the whipping and mixing instructions closely.
Can I use brown sugar instead of white sugar?
You can, but it will change the cake. Brown sugar contains molasses, which adds moisture and a deeper, caramel-like flavor. Your cake will be slightly darker in color, more moist, and have a richer taste. It will still be delicious, but it won’t have that pure, pale “snowflake” appearance. For the classic look and light flavor, white sugar is best.
How do I know my Snowflake Cake is done baking?
The best method is the skewer or toothpick test. About 50 minutes into baking, insert a clean skewer into the center of the cake. Pull it out. If it comes out clean with no wet batter clinging to it, the cake is done. If you see sticky batter, bake for another 5 minutes and test again. Also, the top should be a uniform golden color and feel springy when lightly pressed with a finger.
Can I add frosting to this Snowflake Cake?
Absolutely! This cake is a wonderful base for frosting. A simple vanilla buttercream, a dusting of powdered sugar, or a light cream cheese frosting all pair beautifully. Let the cake cool completely before frosting. If the cake is warm, the frosting will melt and slide off. For a less sweet option, a dollop of whipped cream on each slice is also perfect.
What can I do if my cake sank in the middle after baking?
A sunken center usually means the cake was underbaked, or the oven door was opened too early before the structure had set. It could also mean there was too much liquid in the batter (incorrect measuring). To salvage it, you can still enjoy the cake! The edges are likely perfectly baked. You can fill the sunken center with whipped cream or berries to disguise it. Next time, ensure proper baking time and avoid opening the oven.
Is this Snowflake Cake recipe suitable for layer cakes?
This recipe is designed for a single-layer cake in a specific pan size. To make a layer cake, you would need to double or triple the recipe and divide the batter between two or three pans of the same size. Be aware that baking times might need adjustment for thinner layers. The texture is light and tender, making it possible for layers, but handle slices carefully as they are delicate.
Can I make this cake gluten-free?
Yes, you can experiment with a gluten-free all-purpose flour blend. Look for a blend that is meant for baking and contains a mix of rice flour, starches, and perhaps xanthan gum. The xanthan gum helps replicate the binding property of gluten. Results may vary slightly in texture, but it should work. I recommend using a blend you’ve had success with in other cakes.
Why do I need to add flour one tablespoon at a time?
Adding flour gradually prevents two problems. First, it avoids creating large, dry lumps of flour in your wet batter. Second, it minimizes the mixing time needed to incorporate the flour. Less mixing means less gluten development, which keeps your cake soft and tender. If you dump all the flour in, you’ll likely need to mix longer to smooth it out, risking a tougher cake.
How long can I store the Snowflake Cake, and how?
At room temperature in an airtight container, it stays fresh for 2-3 days. In the refrigerator, wrapped well, it lasts up to 5 days. You can also freeze it for up to 3 months. To freeze, wrap the whole cake or slices tightly in plastic wrap, then in foil or a freezer bag. Thaw in the refrigerator overnight. The cake retains its moisture and flavor beautifully after thawing.
Ready to Bake Your Own Snowflake?
So there you have it, my dear friend. The complete guide to creating a beautiful, tender Snowflake Cake. This recipe is a testament to how simple ingredients, treated with care, can create something truly magical. It’s the cake I bake when I want to feel the joy of creating something from scratch, without any stress. I hope it becomes a cherished recipe in your home too, bringing sweet moments and happy smiles to your table. Now, go warm up your oven and whisk up some joy! Happy baking!
Equipment
- Grand bol
- Fouet
- Spatule
- Plaque à pâtisserie
- Papier sulfurisé
Ingredients
- 3 œufs
- 150 g sucre
- 1 cuil. à café extrait de vanille
- 1 pincée sel
- 60 ml huile végétale
- 80 ml lait
- 200 g farine tout usage
- 7 g poudre à lever
Instructions
- Préchauffez le four à 170 °C (340 °F) et tapissez un moule à gâteau rond de 16 cm (6 pouces) de papier sulfurisé.
- Dans un grand bol, battez les œufs, le sucre et l'extrait de vanille jusqu'à ce que le mélange devienne pâle et crémeux.
- Abaissez la vitesse du mélangeur et ajoutez l'huile végétale et le lait, en mélangeant jusqu'à ce que le tout soit bien combiné.
- Ajoutez progressivement la farine, cuillère par cuillère, tout en mélangeant, puis incorporez la poudre à lever et une pincée de sel. Mélangez jusqu'à obtention d'un mélange homogène.
- Versez la pâte dans le moule préparé et enfournez pendant 50 à 55 minutes ou jusqu'à ce qu'un cure-dent en ressorte propre.
- Laissez le gâteau refroidir dans le moule pendant 10 minutes avant de le transférer sur une grille pour le laisser refroidir complètement.
Notes
Nutrition

Hi, I’m Olivia Parker, the founder of BakingSecret.com and a lifelong lover of all things sweet and homemade. I grew up in a small town in Oregon, where the smell of fresh cookies in my family’s kitchen sparked my passion for baking. Over the years, I turned that passion into a mission: to help home bakers feel confident, inspired, and creative.
After studying food science and working in several artisan bakeries across the U.S., I decided to create a space where everyone from beginners to seasoned bakers can find reliable recipes, expert tips, and a warm, welcoming community. BakingSecret.com is my way of sharing the magic of baking with the world. When I’m not testing new recipes, you’ll find me exploring farmers’ markets, collecting vintage cookbooks, or perfecting my sourdough technique.