
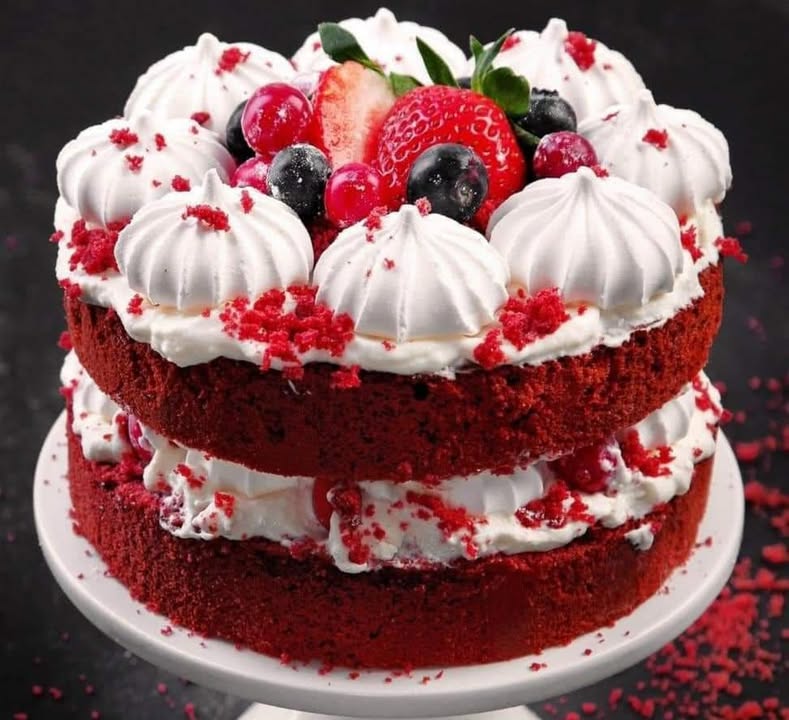
You know that feeling when you need a show-stopping dessert that’s as beautiful as it is delicious? For me, that’s always a classic Red Velvet Cake. There’s something magical about that rich, velvety crumb and the tangy-sweet cream cheese frosting. I perfected this recipe after my son’s third birthday party. I wanted a cake that was stunning but didn’t require fancy decorating skills. This one won over every single guest, from the kids to the grandparents, and has been my go-to celebration cake ever since.
The Story Behind the Classic Red Velvet Cake
The history of Red Velvet Cake is as rich as its flavor. Some say it started in the Victorian era, using beets to both color and moisten the cake. The modern version, with its bright red color, became famous at the Waldorf-Astoria Hotel in New York. The cocoa isn’t there for a strong chocolate flavor. It actually reacts with the vinegar and buttermilk to create that unique, tender texture and subtle tang. My version uses a simple swap for buttermilk, making it super easy for home bakers. It’s a beautiful mix of tradition and convenience.
Why You’ll Love This Red Velvet Cake Recipe
This recipe is a total winner. First, the flavor is incredible—not too sweet, not too chocolaty, just perfectly balanced. Second, it’s surprisingly simple. You don’t need any special mixer skills. The batter comes together in two bowls. The vibrant color makes it look like you spent hours on it. I promise, the “wow” factor is huge for the effort. It’s the kind of cake that makes people ask, “You made this?!” in the best possible way.
Perfect Occasions for a Red Velvet Cake
This cake is a celebration superstar! I’ve baked it for so many happy moments. It’s perfect for Valentine’s Day, with its romantic red hue. It’s a must for Christmas dessert tables and birthdays of all ages. I’ve even made it as a “just because” treat to cheer up a friend. It’s versatile, elegant, and always feels special. Any day you want to add a little extra joy is the right day for this cake.
Red Velvet Cake Ingredients
Here’s what you’ll need to create this stunning cake. Make sure your eggs and butter are at room temperature for a smooth, lump-free batter.
- 2 1/2 cups all-purpose flour
- 1 1/2 cup granulated sugar
- 1 teaspoon of baking powder
- 1 teaspoon of baking soda
- 1/2 teaspoon of salt
- 2 tablespoons of unsweetened cocoa powder
- 1 1/2 cup vegetable oil
- 1 cup butter, room temperature
- 2 large eggs, room temperature
- 2 tablespoons red food coloring
- 1 teaspoon of vanilla extract
- 1 teaspoon of white vinegar
- Cream cheese frosting store bought or homemade
Handy Ingredient Substitutions
Don’t worry if you’re missing an item! Baking is forgiving. Try these easy swaps:
- Buttermilk Substitute: No buttermilk? The vinegar in this recipe reacts with the milk proteins in the batter, creating a similar tender effect. For a more traditional taste, you could replace 1 cup of the oil with 1 cup of buttermilk.
- Oil: You can use an equal amount of canola oil or even melted, cooled coconut oil.
- Food Coloring: For a natural tint, use 1 cup of beet puree. Reduce the oil by 1/4 cup to account for the extra moisture.
- Cocoa Powder: Regular unsweetened cocoa powder works best. Don’t use Dutch-processed, as it can affect the rise.
How to Make the Best Red Velvet Cake
Follow these simple steps for a perfect, moist cake every single time. Let’s get baking!
Step 1: Prep Your Pans and Oven
Start by preheating your oven to 350°F (175°C). This ensures a consistent temperature for baking. Take your two 9-inch round cake pans and grease them generously with butter or shortening. Then, dust them lightly with flour, tapping out any excess. This step is your cake’s insurance policy. It guarantees your beautiful red velvet layers will slide out cleanly after baking. Pro tip: For extra security, place a round of parchment paper at the bottom of each pan after greasing.
Step 2: Combine the Dry Ingredients
In a large mixing bowl, grab your whisk. Add the all-purpose flour, granulated sugar, baking powder, baking soda, salt, and cocoa powder. Whisk them together thoroughly. You’ll see the pale flour become lightly speckled with the cocoa. This step is crucial. It evenly distributes the leavening agents and cocoa so every bite is consistent. No one wants a bite with all the baking soda!
Step 3: Mix the Wet Ingredients
In a separate, medium-sized bowl, combine the vegetable oil, softened butter, room-temperature eggs, red food coloring, vanilla extract, and white vinegar. Use a hand mixer or a sturdy whisk. Mix until the ingredients are completely smooth and emulsified. The batter will become a stunning, deep red liquid. The vinegar smells sharp now, but it’s the secret to that classic, tender red velvet crumb.
Step 4: Bring the Batter Together
Now for the fun part! Pour the gorgeous red wet mixture into the bowl with the dry ingredients. Stir gently with a spatula or mix on low speed. Stop as soon as you no longer see streaks of flour. A few small lumps are okay. Overmixing is the enemy of a soft cake. It develops the gluten in the flour and can lead to a tough, dense texture instead of that signature velvet cake softness.
Step 5: Divide and Conquer
Pour the thick, vibrant batter into your prepared pans. Use a kitchen scale or just eyeball it to split it evenly. Smooth the tops with your spatula. This helps the cakes bake uniformly. Seeing that rich red color in the pans is always so exciting. You know something delicious is just minutes away in the oven.
Step 6: Bake to Perfection
Carefully place the pans in the center of your preheated oven. Bake for 25 to 30 minutes. The cakes are done when the edges pull away from the pan and a toothpick inserted into the center comes out clean, maybe with a few moist crumbs. Your kitchen will smell amazing. Pro tip: Avoid opening the oven door too early. A draft can cause the cakes to fall.
Step 7: Cool the Layers
Once baked, let the cakes cool in their pans on a wire rack for 10 minutes. This allows them to set. Then, run a butter knife around the edges to loosen them. Invert the pans onto the rack and gently lift them off. Let the cakes cool completely before you even think about frosting. Frosting a warm cake is a recipe for a melted, sliding mess.
Step 8: Frost and Assemble Your Masterpiece
This is the final, rewarding step. Place one completely cooled cake layer on your serving plate. Spread a generous, even layer of cream cheese frosting over the top. Gently place the second layer on top. Now, frost the top and sides with the remaining frosting. Use a spoon or offset spatula to create beautiful swirls. Chef’s tip: For a clean look, do a thin “crumb coat” first, chill the cake for 15 minutes, then apply the final, thick layer of frosting.
Red Velvet Cake Timing
Good baking is all about timing. Here’s a quick breakdown for planning:
- Prep Time: 20 minutes
- Cook Time: 30 minutes
- Cooling Time: 1 hour (very important!)
- Frosting/Decorating Time: 15 minutes
- Total Time: About 2 hours 5 minutes
A Chef’s Secret for Ultimate Moisture
My secret trick is simple but powerful. After baking, while the cakes are still hot in the pan, I brush the tops lightly with simple syrup (equal parts sugar and water, heated until dissolved). This adds an extra layer of moisture that keeps the cake incredibly soft for days. It’s a trick I learned from professional bakers and it never fails.
A Dash of Cake Trivia
Did you know the original “velvet” cakes got their name from their texture? Recipes for “velvet” cakes, like mahogany or devil’s food, used cocoa or coffee to create a fine, soft crumb that was smoother than standard cakes. The “red” part became popular later, thanks to food coloring. So when you make this, you’re baking a piece of tasty history!
Necessary Equipment
You don’t need fancy gear. Here’s what I use:
- Two 9-inch round cake pans
- Large and medium mixing bowls
- Whisk and spatula
- Hand mixer or stand mixer (helpful but not essential)
- Measuring cups and spoons
- Wire cooling rack
- Toothpick or cake tester
How to Store Your Red Velvet Cake
Because of the cream cheese frosting, your Red Velvet Cake needs to be stored in the refrigerator. Place it in an airtight cake carrier or cover it loosely with plastic wrap. It will stay fresh and moist for up to 5 days.
You can also freeze the unfrosted cake layers for longer storage. Wrap each cooled layer tightly in plastic wrap, then again in aluminum foil. They will keep well for up to 3 months. Thaw overnight in the fridge before frosting.
If you need to transport the cake, keep it in a cooler with an ice pack. The last thing you want is the frosting getting too soft on a warm day.
My Top Tips and Advice
- Room temp is key: Seriously, let your eggs and butter sit out. It makes blending so much easier and prevents a curdled batter.
- Measure flour correctly: Spoon flour into your measuring cup and level it off. Don’t scoop from the bag. Scooping packs the flour and can dry out your cake.
- Quality food coloring: For a truly vibrant red, use gel food coloring. Liquid works, but you may need more.
- Patience with cooling: I know it’s hard to wait. But frosting a warm cake is the biggest mistake. Let it cool completely.
Presentation Ideas to Wow Your Guests
- Top with fresh raspberries or edible flowers for a pop of color.
- Use a fork to create elegant, wavy lines in the frosting.
- Sprinkle the top with finely crushed Oreo cookies for a “dirt” effect.
- Pipe rosettes around the top edge using a star tip.
- Serve on a beautiful cake stand with a glass dome.
Delicious Red Velvet Recipe Variations
Love this classic? Try these fun twists!
- Red Velvet Cupcakes: Perfect for parties! Pour the batter into lined muffin tins and bake for 18-22 minutes. Frost with a swirl of cream cheese frosting.
- Red Velvet Cheesecake: Marble red velvet cake batter into a classic cheesecake batter before baking for a stunning and decadent dessert.
- Red Velvet Cake Pops: Crumble leftover cake, mix with a little frosting, form into balls, and dip in chocolate. Kid and adult favorite!
- Red Velvet Layer Cake with Berries: Add a layer of fresh strawberry or raspberry compote between the cake layers along with the frosting.
- Mini Red Velvet Cakes: Use 6-inch cake pans for an adorable, intimate dessert. Baking time will be slightly less.
- Red Velvet Sheet Cake: Bake the batter in a 9×13 inch pan for easy serving at large gatherings. Frost right in the pan.
If you’re looking for more classic inspiration, my recipe for a perfect Vanilla Bean Bundt Cake is a crowd-pleaser. For another stunning layered dessert, this Mirror Glaze Chocolate Mousse Cake is pure magic. And if cupcakes are more your speed, my Salted Caramel Apple Cupcakes are ideal for fall. You can find all these and more fantastic cake and cupcake recipes on my site for your next baking project!
Common Mistakes to Avoid
Mistake 1: Using Cold Ingredients
This happens when we’re in a hurry. Cold butter and eggs won’t blend smoothly into the oil. This can cause the batter to look curdled or separate. It also traps less air, leading to a denser cake. Always plan ahead. Take your eggs and butter out of the fridge at least an hour before you start baking. They should feel cool to the touch, not cold.
Mistake 2: Overmixing the Batter
We often mix because we want every lump gone. But with cake batter, overmixing is a problem. It overworks the gluten in the flour. This makes the cake tough and chewy, not soft and tender. Mix the wet and dry ingredients just until they are combined. A few small lumps are perfectly fine. They will bake out. Remember, you want a velvet texture, not a bread texture.
Mistake 3: Overbaking the Layers
It’s easy to think a few more minutes will make it better. Overbaking dries out the cake. The edges become hard and the crumb loses its moisture. Always set a timer. Start checking at the 25-minute mark with a toothpick. It should come out with a few moist crumbs attached, not completely clean and dry. The cake will continue to cook a little as it cools in the pan.
Mistake 4: Frosting a Warm Cake
The excitement to finish can lead to this mess. A warm cake will melt the cream cheese frosting. It becomes a slippery, gloppy disaster that soaks into the cake. It also tears the tender crumbs. Have patience. Let the cakes cool in the pans, then on a rack. They must be completely cool to the touch. This is non-negotiable for a beautiful final product.
Mistake 5: Using the Wrong Cocoa Powder
Grabbing Dutch-processed cocoa is a common error. It’s treated with an alkali to neutralize its acidity. Your recipe needs the natural acidity of regular unsweetened cocoa to react with the baking soda and vinegar. This reaction gives the cake its lift and subtle tang. Always double-check your container and use natural, unsweetened cocoa powder for the best results.
For more great time-saving cooking and food quality advice, I often turn to trusted resources that combine good science with practical kitchen sense.
Frequently Asked Questions
Can I make this Red Velvet Cake without food coloring?
Absolutely, you can! The cake will taste just as good, but it will be a deep brownish-red color, like the original “mahogany” cakes. For a natural red hue, you can use one cup of beet puree. Just remember to reduce the vegetable oil in the recipe by about a quarter cup to account for the extra liquid from the beets. The beet flavor is very mild and blends right in with the cocoa.
Why do I need vinegar in a cake recipe?
The white vinegar is a key player in a classic red velvet cake. It reacts with the baking soda to create bubbles of carbon dioxide. These tiny bubbles help the cake rise and become light and tender. The vinegar also reacts with the cocoa and the dairy (from the butter) to enhance that signature slight tanginess. Don’t worry, you won’t taste vinegar in the final cake at all. It’s just there for chemistry magic.
Can I make the cake layers ahead of time?
Yes, this is a fantastic time-saving strategy. Once the baked cake layers are completely cooled, wrap them tightly in plastic wrap. Then, place them in a large zip-top bag or wrap them again in aluminum foil. They can be stored at room temperature for one day, in the refrigerator for up to three days, or frozen for three months. Thaw frozen layers in the refrigerator overnight before frosting.
What’s the best cream cheese frosting for this cake?
A simple, stiff cream cheese frosting works best. Use full-fat, brick-style cream cheese, not the spreadable kind in a tub. Beat room-temperature butter and cream cheese until smooth, then gradually add powdered sugar and a splash of vanilla. For extra stability in warm weather, add a tiny pinch of salt. If your frosting seems too soft, just chill it in the fridge for 20 minutes before using it.
My cake didn’t turn out very red. What happened?
The vibrancy of the red color depends heavily on the type and brand of food coloring. Liquid food coloring often gives a more pink or muted red. For a truly bold, classic red, I highly recommend using a gel-based food coloring. Gel colors are more concentrated, so you use less and get a much more intense color without adding extra liquid to your batter.
Can I use this batter to make a sheet cake or cupcakes?
You sure can! For a sheet cake, pour the batter into a greased and floured 9×13 inch pan. The baking time will be similar, maybe 30-35 minutes. For cupcakes, fill lined muffin cups about two-thirds full. Bake at the same temperature for 18 to 22 minutes. Always do the toothpick test to check for doneness, as baking times can vary slightly with different pan sizes.
How do I get my cake layers perfectly flat for stacking?
Cake layers often dome a bit in the center. You can slice off the dome with a long serrated knife once the cake is completely cool. Or, try using cake strips! These are fabric strips you soak in water and wrap around the outside of the cake pan. They keep the edges cooler so the cake bakes evenly and rises flat. It’s a game-changer for professional-looking layers.
Is it okay to use a store-bought cream cheese frosting?
It is perfectly okay, especially if you’re short on time. A good quality store-bought frosting will work. For the best flavor, I suggest doctoring it up a bit. Let it come to room temperature, then whip it with your mixer for a minute or two. You can fold in some extra softened cream cheese or a little more powdered sugar to improve the texture and taste to your liking.
Why is my cake dry or crumbly?
A dry cake is usually caused by overbaking or overmixing the batter. Always set a timer and check early. Also, make sure you measured your flour correctly. Scooping flour directly from the bag packs it down, adding too much dry ingredient to the recipe. The proper way is to spoon flour into your measuring cup and level it off with a knife.
How long can a frosted Red Velvet Cake sit out?
Because the frosting contains cream cheese and butter, you shouldn’t leave the frosted cake out at room temperature for more than two hours. After that, it needs to be refrigerated to keep it food-safe. When serving, you can take it out of the fridge about 30 minutes beforehand. This allows the frosting to soften slightly for the best texture and flavor.
I hope this guide gives you the confidence to bake this stunning cake. It’s a recipe filled with love, a little history, and a whole lot of flavor. Whether it’s for a big party or a quiet Tuesday, baking a Red Velvet Cake always feels like a special event. So preheat that oven, put on your apron, and get ready to make something truly delicious. Happy baking!
Equipment
- Grand bol
- Fouet
- Spatule
- Plaque à pâtisserie
- Papier sulfurisé
Ingredients
- 2 1/2 tasses farine tout usage
- 1 1/2 tasse sucre
- 1 cuil. à café poudre à lever
- 1 cuil. à café bicarbonate de soude
- 1/2 cuil. à café sel
- 2 cuil. à soupe cacao en poudre
- 1 1/2 tasse huile végétale
- 1 tasse beurre à température ambiante
- 2 grands œufs à température ambiante
- 2 cuil. à soupe colorant alimentaire rouge
- 1 cuil. à café extrait de vanille
- 1 cuil. à café vinaigre blanc
- q.s. glaçage au fromage à la crème du commerce ou fait maison
Instructions
- Préchauffez votre four à 175°C et préparez deux moules à gâteau ronds de 9 pouces en les graissant et en les saupoudrant de farine.
- Dans un grand bol, fouettez ensemble la farine tout usage, le sucre, la poudre à lever, le bicarbonate de soude, le sel et le cacao en poudre.
- Dans un autre bol, mélangez l'huile végétale, le beurre ramolli, les œufs, le colorant alimentaire rouge, l'extrait de vanille et le vinaigre blanc jusqu'à ce que le mélange soit lisse.
- Versez le mélange humide dans les ingrédients secs et mélangez délicatement jusqu'à ce qu'ils soient juste combinés, sans trop mélanger.
- Divisez la pâte également entre les moules préparés et lissez le dessus.
- Faites cuire les gâteaux pendant 25 à 30 minutes jusqu'à ce que les bords se détachent du moule et qu'un cure-dent en ressorte propre.
- Laissez les gâteaux refroidir dans les moules pendant 10 minutes, puis retirez-les et laissez-les refroidir complètement sur une grille.
- Gelez les gâteaux refroidis avec le glaçage au fromage à la crème, en appliquant d'abord une couche de miettes si désiré, puis une épaisse couche finale de glaçage.
Notes
Nutrition

Hi, I’m Olivia Parker, the founder of BakingSecret.com and a lifelong lover of all things sweet and homemade. I grew up in a small town in Oregon, where the smell of fresh cookies in my family’s kitchen sparked my passion for baking. Over the years, I turned that passion into a mission: to help home bakers feel confident, inspired, and creative.
After studying food science and working in several artisan bakeries across the U.S., I decided to create a space where everyone from beginners to seasoned bakers can find reliable recipes, expert tips, and a warm, welcoming community. BakingSecret.com is my way of sharing the magic of baking with the world. When I’m not testing new recipes, you’ll find me exploring farmers’ markets, collecting vintage cookbooks, or perfecting my sourdough technique.